Saturday, March 31, 2012
Sunday, March 25, 2012
And the Winner Is.....
For my March giveaway the winner is Britta Senecal! Congratulations and I hope you enjoy it. Here is what you won:
1. Two makeup brushes (that I gave a little bling to)
2. Redken Anti Snap
3. Office accessories- push pins and paper weights
4. Sticky note clip board
5. Sinful nail polish
6. Chapstick with a touch of Spring
7. Makeup brush cleanser

1. Two makeup brushes (that I gave a little bling to)
2. Redken Anti Snap
3. Office accessories- push pins and paper weights
4. Sticky note clip board
5. Sinful nail polish
6. Chapstick with a touch of Spring
7. Makeup brush cleanser

Sunday, March 18, 2012
Cute Office Accessories
After all that hard work redecorating and re organizing the office I had to accessorize it. In this post I will show you how to make your own paper weights, pin tacks and fancy paper clips.
What you need:
1. Scrapbook paper of your choice.
2. Large and small clear flat glass marbles
3. Mod podge
4. Thumb tacks
5. Paper clips
6. E6000 glue
7. Sponge paint brush
Paper Weights:

1. Take your large clear glass flat marble and make sure its clean. Then put it on your paper and trace it.
2. Cut out the piece of paper and put a thin layer of mod podge on the printed, or side you will see thru the glass.
 3. Place the paper mod podge side up to the bottom flat piece of the marble. Smooth it out with your finger. Once it's in place paint a thin layer of mod podge on the bottom. Place it upside down to dry.
Now you have some cute paper weights.
Paper Clips:
This was very easy. I found these epoxy pictured gems at Michaels on clearance and at first I didn't know what I wanted to do with them but for .68 I couldn't go wrong. They were actually meant to be used to make jewelry pieces but I thought they would be cute to glue to paper clips. You could really use anything that you would like to see on a paper clip.
I used gem tack glue at first but the E6000 would be better. Just place some glue on the back of your decorative piece and apply the top of the paper clip and let it dry. With E6000 you have to allow it to dry for about 24 hours but it won't come off after that.

Bulletin Board Thumb Tacks:
1. Take the same steps to the paper weights to apply the paper to the back of the small flat marbles. But with these they are not so uniform so you will want to trace each marble and keep the piece of paper with the marble.
2. After you let the mod podge dry (about 10 mins) apply a small dot of E6000. Then press your tack into the glue.

 3. Let them dry upside down for 24 hours. You might be able to get away with 12 hours because it's a small amount of glue.

I bought my marbles at Michaels and Craft Warehouse. The small marbles are the same ones you can find by the vases and candles. Honestly even if you didn't want to mess with the mod podge you could just glue the tack onto whatever color of marble you wanted. The large flat marbles I only found in clear but they are meant to make paper weights. Hope you guys liked this post and try this out.
What you need:
1. Scrapbook paper of your choice.
2. Large and small clear flat glass marbles
3. Mod podge
4. Thumb tacks
5. Paper clips
6. E6000 glue
7. Sponge paint brush
Paper Weights:

1. Take your large clear glass flat marble and make sure its clean. Then put it on your paper and trace it.
2. Cut out the piece of paper and put a thin layer of mod podge on the printed, or side you will see thru the glass.

Now you have some cute paper weights.
Paper Clips:
This was very easy. I found these epoxy pictured gems at Michaels on clearance and at first I didn't know what I wanted to do with them but for .68 I couldn't go wrong. They were actually meant to be used to make jewelry pieces but I thought they would be cute to glue to paper clips. You could really use anything that you would like to see on a paper clip.
I used gem tack glue at first but the E6000 would be better. Just place some glue on the back of your decorative piece and apply the top of the paper clip and let it dry. With E6000 you have to allow it to dry for about 24 hours but it won't come off after that.

Bulletin Board Thumb Tacks:
1. Take the same steps to the paper weights to apply the paper to the back of the small flat marbles. But with these they are not so uniform so you will want to trace each marble and keep the piece of paper with the marble.
 |
| The paper mod podged on the marble |


 |
| Proudly on display! |
 |
| See how you can see the image thru the marble? |
Saturday, March 17, 2012
Complete Office Redo
I have been MIA for over a week but I am back with a HUGE blog post. Life just happened to catch up with me and I had to take a moment to breathe so I could maintain my sanity. This should make up for lost time.
So I took on the task of completely redecorating and reorganizing our office. With as much as I have been blogging, crafting and what ever else I can manage to cram into my life I needed a space that was organized, cute and fun. Not to mention I had an itch to paint something teal.
My basic formula to organizing anything and any room, space etc. is simple. I take an inventory of what I have in that area. Then I take a look (I really actually go into the space) and see where I can put things, what type of tote, bin or container I can use. Use what you have before you go out and buy all new stuff. Then I made a list (what a surprise). What container I have and what will go in it. For example see the pictures below. I took my scrapbook paper and reorganized it.
I went onto my closet in my office and did the same thing. I did buy a cubby shelf unit that makes it super cute and neat. Yes, I know it's in a closet but when I open up those doors I just feel so....accomplished and I feel so inspired to make something because I can actually find what I need. I re painted and re purposed my wicker dresser that I had as well (see the first picture above). I made sense of where I put things. For instance, I put all my glue and tape in one drawer. My tissue paper and ribbon for gifts are all in one bin. Here are some pictures.
For wicker dresser I took out the middle and bottom drawers. I added a shelf to the bottom and painted the top three drawers. I changed the handles on the drawers to add some character. I didn't want to overwhelm the dresser with drawers any more. Keeping something open at the bottom adds a way for you to be innovative with your space. A pop of color in a room will always make the biggest difference.
With the unit in the closet I wanted different textures and I wanted my things to be accessible. I actually organized everything so well that I have empty bins! That's always a good thing for me.
I hope this has helped or inspired you. These projects are a major process but if you take your time it's easy. Be more open to the fact that your plan might change slightly. There is always a solution to it all.
So I took on the task of completely redecorating and reorganizing our office. With as much as I have been blogging, crafting and what ever else I can manage to cram into my life I needed a space that was organized, cute and fun. Not to mention I had an itch to paint something teal.
My basic formula to organizing anything and any room, space etc. is simple. I take an inventory of what I have in that area. Then I take a look (I really actually go into the space) and see where I can put things, what type of tote, bin or container I can use. Use what you have before you go out and buy all new stuff. Then I made a list (what a surprise). What container I have and what will go in it. For example see the pictures below. I took my scrapbook paper and reorganized it.
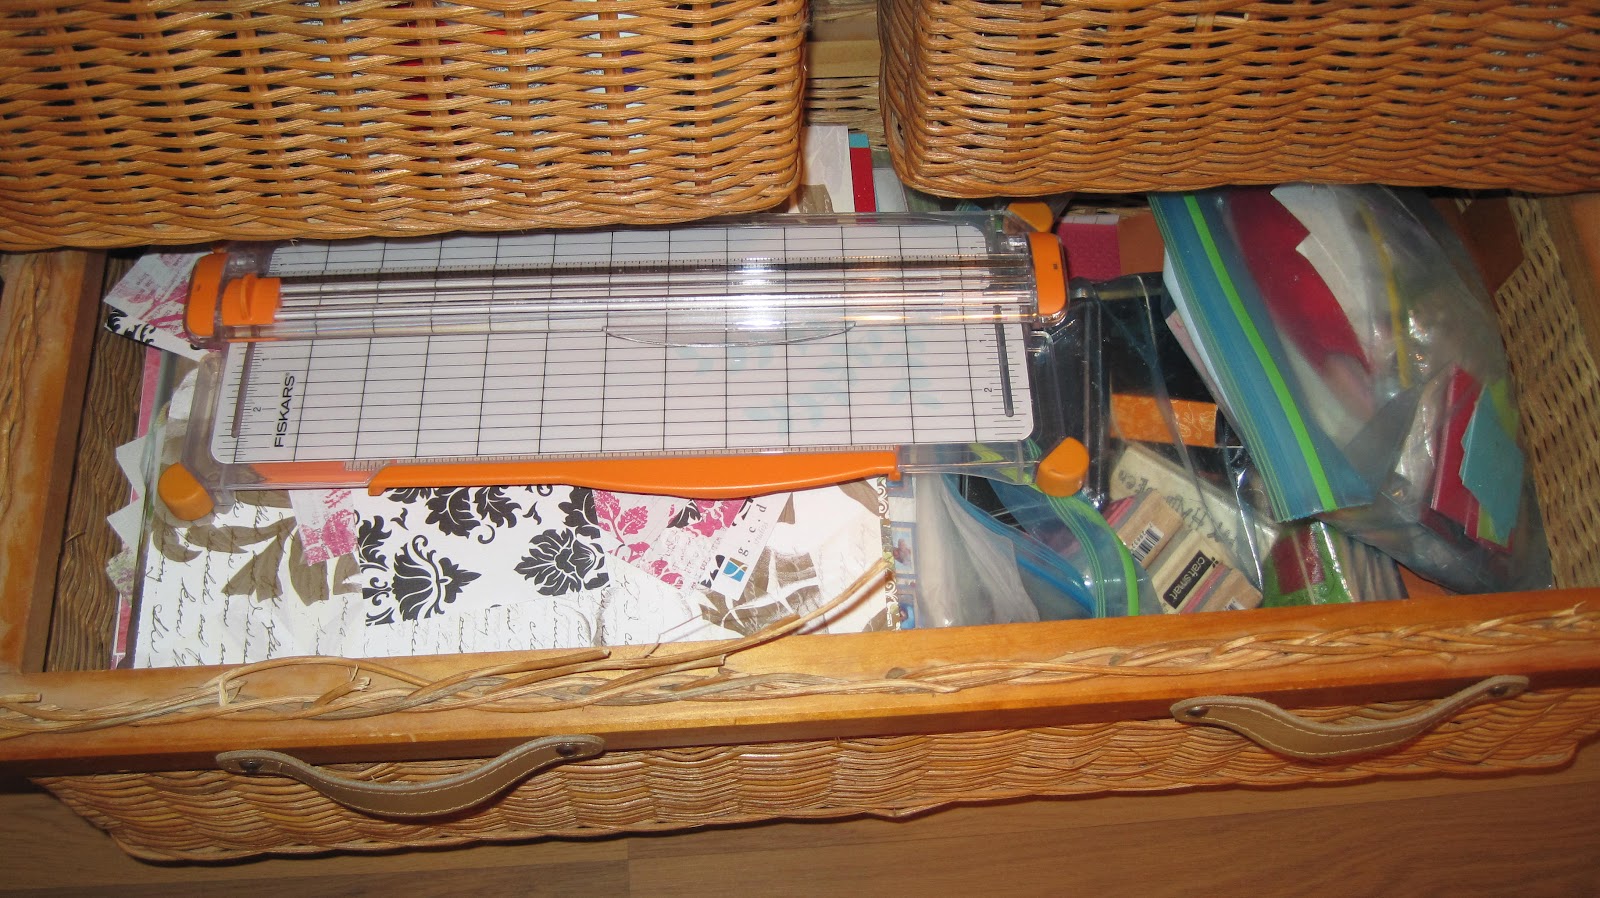 |
| Jammed in one drawer! AAAHHHH! |
 |
| Relief at last! All organized. |
 |
| See? Nice and tidy. |
 |
| Now there is even a spot for my stickers. |
 |
| All in one. |
I went onto my closet in my office and did the same thing. I did buy a cubby shelf unit that makes it super cute and neat. Yes, I know it's in a closet but when I open up those doors I just feel so....accomplished and I feel so inspired to make something because I can actually find what I need. I re painted and re purposed my wicker dresser that I had as well (see the first picture above). I made sense of where I put things. For instance, I put all my glue and tape in one drawer. My tissue paper and ribbon for gifts are all in one bin. Here are some pictures.
 |
| My teal that I have been wanting! |
 |
| All organized and everything has its own place. |
For wicker dresser I took out the middle and bottom drawers. I added a shelf to the bottom and painted the top three drawers. I changed the handles on the drawers to add some character. I didn't want to overwhelm the dresser with drawers any more. Keeping something open at the bottom adds a way for you to be innovative with your space. A pop of color in a room will always make the biggest difference.
With the unit in the closet I wanted different textures and I wanted my things to be accessible. I actually organized everything so well that I have empty bins! That's always a good thing for me.
I hope this has helped or inspired you. These projects are a major process but if you take your time it's easy. Be more open to the fact that your plan might change slightly. There is always a solution to it all.
Monday, March 5, 2012
My Rubber Ducky has an Accessory
March brings us St. Patrick's Day! While I was looking for something for another project of mine I came across a clover button and I decided that my rubber ducky needed a necklace.


Nice Girls Wear Pink on Tuesdays
Yes, another pink outfit for my NGWPT! This time I took photos of my accessories. Hope you like it!
 |
| The full outfit |
 |
| Feather earrings! I made them too. |
 |
| Metal bracelets. |
 |
| Zipper jean flats |
 |
| Simple monogram necklace |
Subscribe to:
Posts (Atom)